Tuesday, September 20, 2011

Biggest Project of my Life

Last winter, I noticed a big cylinder desk with a bookshelf in my grandma's backyard in her semi-covered shed.  I expressed some interest and she was happy to let me have it.  I immediately went over with my dad (in the snow) to collect it.  I wish I would have taken a picture of the desk where it was in the shed.  It was full of junk my grandma's stuff. Dusty, dirty, peeling, cracking finish, weathered and worn out.  This baby was DAMAGED!

It sat in my dad's garage for a few months the rest of the winter and during the summer while I was away.  I have been furiously working on it a couple times each week so I can complete it before winter gets here. 

If the average person would have come across this desk I'm sure they wouldn't give it a second glance.  But this desk has extreme value to me; it is an heirloom and belonged to my great-great-grandfather (at least that's the last person we know it belonged to).  My dad remembers it being in his grandfather's house as a boy and he and his cousin were convinced that it had a secret hidden compartment and always tried to find it.  (We have yet to find one) I don't know who built this desk, but it was done by hand with extreme craftsmanship and building quality.  This baby is a true antique built of pine, square nails and devotion.  Did it come from the 18th century? The 19th century? I so wish that I knew more information about this desk and where it came from or who built it.  Part of me wants to believe that it was my own ancestor that built it by hand and worked on it so feverishly. 

This desk is three separate pieces with a bookcase on top.  Here are some pictures:


Square nail

Bookcase


 Despite how old and haggered this desk is, the slider roll-top is soooo SMOOTH and works so well.
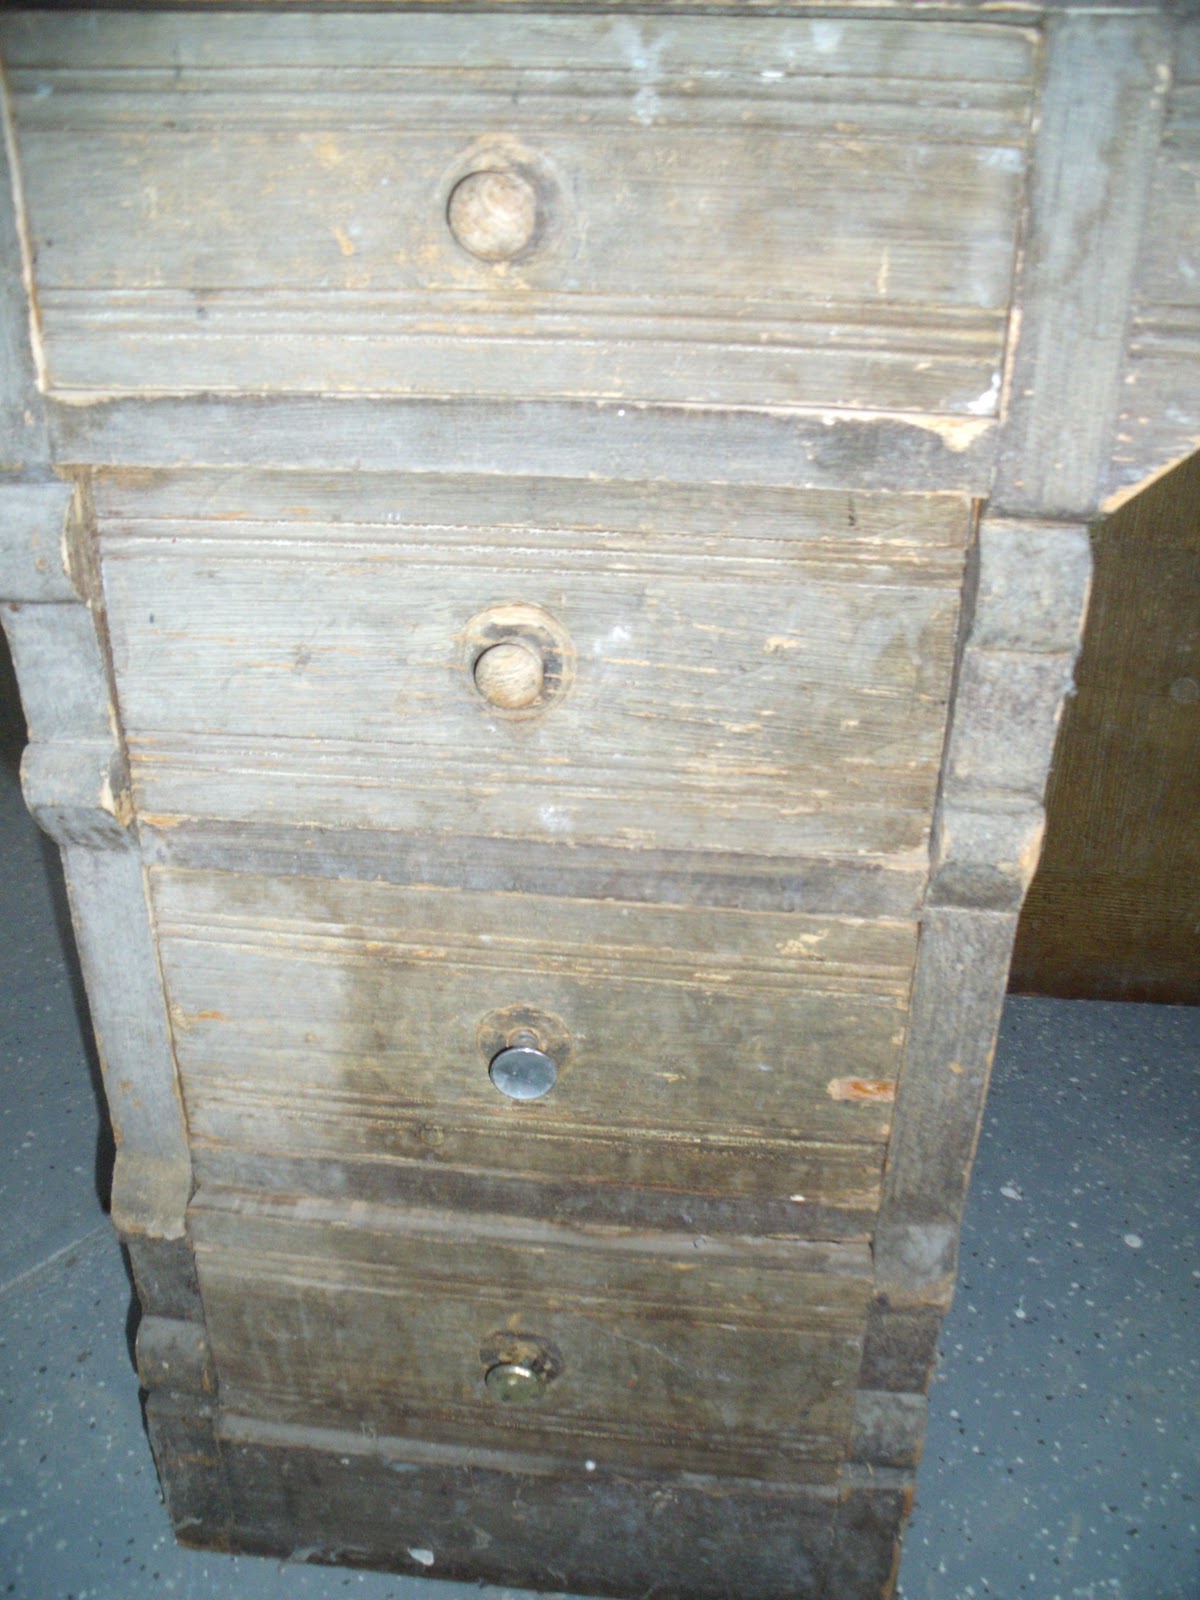

As you can see, I have taken on a HUGE project.  Quite possibly the biggest project of my life.  I doubt I will ever work on anything this old again.  I'm glad I have done other projects to somewhat prepare me for this!  So far, it has been amazing and I have made quite a bit of progress.  I am working on stripping it and sanding it.  The wood grain was actually painted on, so there are layers and layers of paint on this thing!  I plan to stain the desk, possibly a classy, dark walnut; I can't cover up this antique with paint.  Hopefully desk will live on for generations to come and won't need to be refinished ever again!

If you by chance know where I can find more information on this desk, please let me know!  I have spent a lot of time searching and haven't found much. 

More updates to come soon!

Thursday, September 8, 2011

I'm still breathing

Hi Friends,

Just wanted to let you know that I am still alive.
Barely. (I'm being dramatic)
But, still alive.
I have been so sick the past week, but hope to be on the tail end of things.

I promise to share some great things soon.

Thursday, September 1, 2011

Renovated Bread Box

I like a clean counter.

As a pharmacist I have worked with some messy technicians, and some messy pharmacists. It DRIVES me CRAZY! I like to joke with one of my technicians at work about leaving empty bottles on the counter and always cleaning up after her.  One thing that I am very particular about is keeping order, especially at work. {Have you guessed I'm your typical "type A"}

I try to keep order at home too, although it proves to be a bit more difficult. 1) I'm not getting paid; and 2) I have professional "messer uppers" that live with me.  I'm not one that likes a lot of things or appliances out on the counter.  I feel like it can get cluttered quickly; especially if you have a smaller kitchen. I don't function as well when I don't have space to work. or think.

I'm not saying I'm clutter free, because I'm far from it.  It's something I fight with every. single. day. just like everyone else.  I like to hide clutter/things/necessities as much as I can with something that is functional and pretty.

I'm not saying bread is clutter, but I do like to hide it on my counter in my pretty bread box.

I picked up this bread box at a thrift store for $4 dollars.

My usual weapon of choice to paint with is spray paint, but I couldn't get the door off this thing for the life of me!
So I used some plain old acrylic craft paint with a sponge brush:

I didn't sand it, I didn't prime it, I went straight to painting! (luckily I remembered to take a before picture before I got too carried away)

I gave everywhere 2 coats of paint; except the middle section...

There, I decided to add some scrapbook paper with modge podge.

I gave the front of the box a quick glazing with some black glaze.

Spray painted the wooden knob with Oil Rubbed Bronze.
Sealed it all with a few coats of Polycrylic...
And was left with this:

 I love how the scrapbook paper is the same shape as the cut out wood design.
I don't even think I planned it that way.

 I love how the wood grain still shows through the paint


My toaster fits perfectly on top of it.
Which means there's less counter space being taken up by multiple items.
Which means less clutter.
Which means SANITY!

Friday, August 26, 2011

Tutu Lamp Shade {& tutu-torial}


 I bought a pink lamp at a thrift store for a couple bucks a while back.
I thought it would be cute in my daughter's room.


 It had a cream shade on it that was probably once cute.
The glue was yellowy-orange in places,
there were stains on it,
and it was pretty shabby.


The lamp has sat "AS IS" on my daughter's table for almost a year.
Until yesterday...{note: I did rip that top part...it wasn't sitting in her room that shabby}

I wanted to make her a tutu lamp.
There's something magical and graceful about ballerinas,
I think that's why many girls dream about becoming one...
I have made a couple tutus in the past when my daughter was first born:


They are super super easy!  I first decided on how long I wanted the "skirt" part to be.
I decided on 10 inches because I wanted a little overhang on the bottom of the shade. (plus you can always cut it shorter, but can't make it longer)

I cut strips twice that long (20 inches) because the tulle is doubled up when you tie it.
Last time I made a tutu I bought the tulle that comes in a roll that is already 6 inches wide.
This time, I just cut them 6 inches wide myself.


The great thing about cutting all of these strips is that you don't have to be perfect and precise in your cuts.
I REPEAT, you DO NOT have to be PERFECT!

I'm not sure how many strips I cut, probably around 70ish
It will vary depending on how big and frilly you want it :)


I used a hair headband elastic to tie the strips to. 
It's the perfect size and I didn't have to sew anything together!
It also doesn't matter what color because it gets covered up anyway
You can see I used blue...


 {tip: make sure it's about 2 inches smaller than what you need because it stretches after all the knots!}

NEXT STEP: go to a comfortable place {couch} and watch a TV show {Nate Berkus} and tie the tulle strips to the elastic.

Fold the tulle in half and tie a loop knot. 
{tip: make all of the knots go the same way}


It should look something like this:

You can leave them loose if you wish, but I chose to tighten mine quite a bit. This makes a fuller, puffier tutu because you can fit more on.


By the end of the TV show, you should have completed filling the full loop of elastic with tulle strips all the way around.
unless you accidentally got so caught up in said TV show that you didn't "work" the entire time...
then it may take you another show...
I'm not necessarily saying it happened to me, but it could happen...


 Silly me, I was about to go to the fabric store to replace the cream fabric
when it dawned on me to, 
hello, 
SPRAY PAINT it!


I already had a bottle of Krylon Ballet Slipper pink in the garage so I raced outside and doused it a few times.
{after taking off all those pearly beads, of course} 


I covered the top part of the shade with some pink ribbon I had on hand using my glue gun.


I fitted the lamp shade with the tutu skirt, trimmed up some of the edges, 
and finished her off with a purdy pink bow!


It's big and puffy but I like it that way!


 Linking to:


Tip Junkie handmade projectsVisit thecsiproject.comDIY Club


Wednesday, August 24, 2011

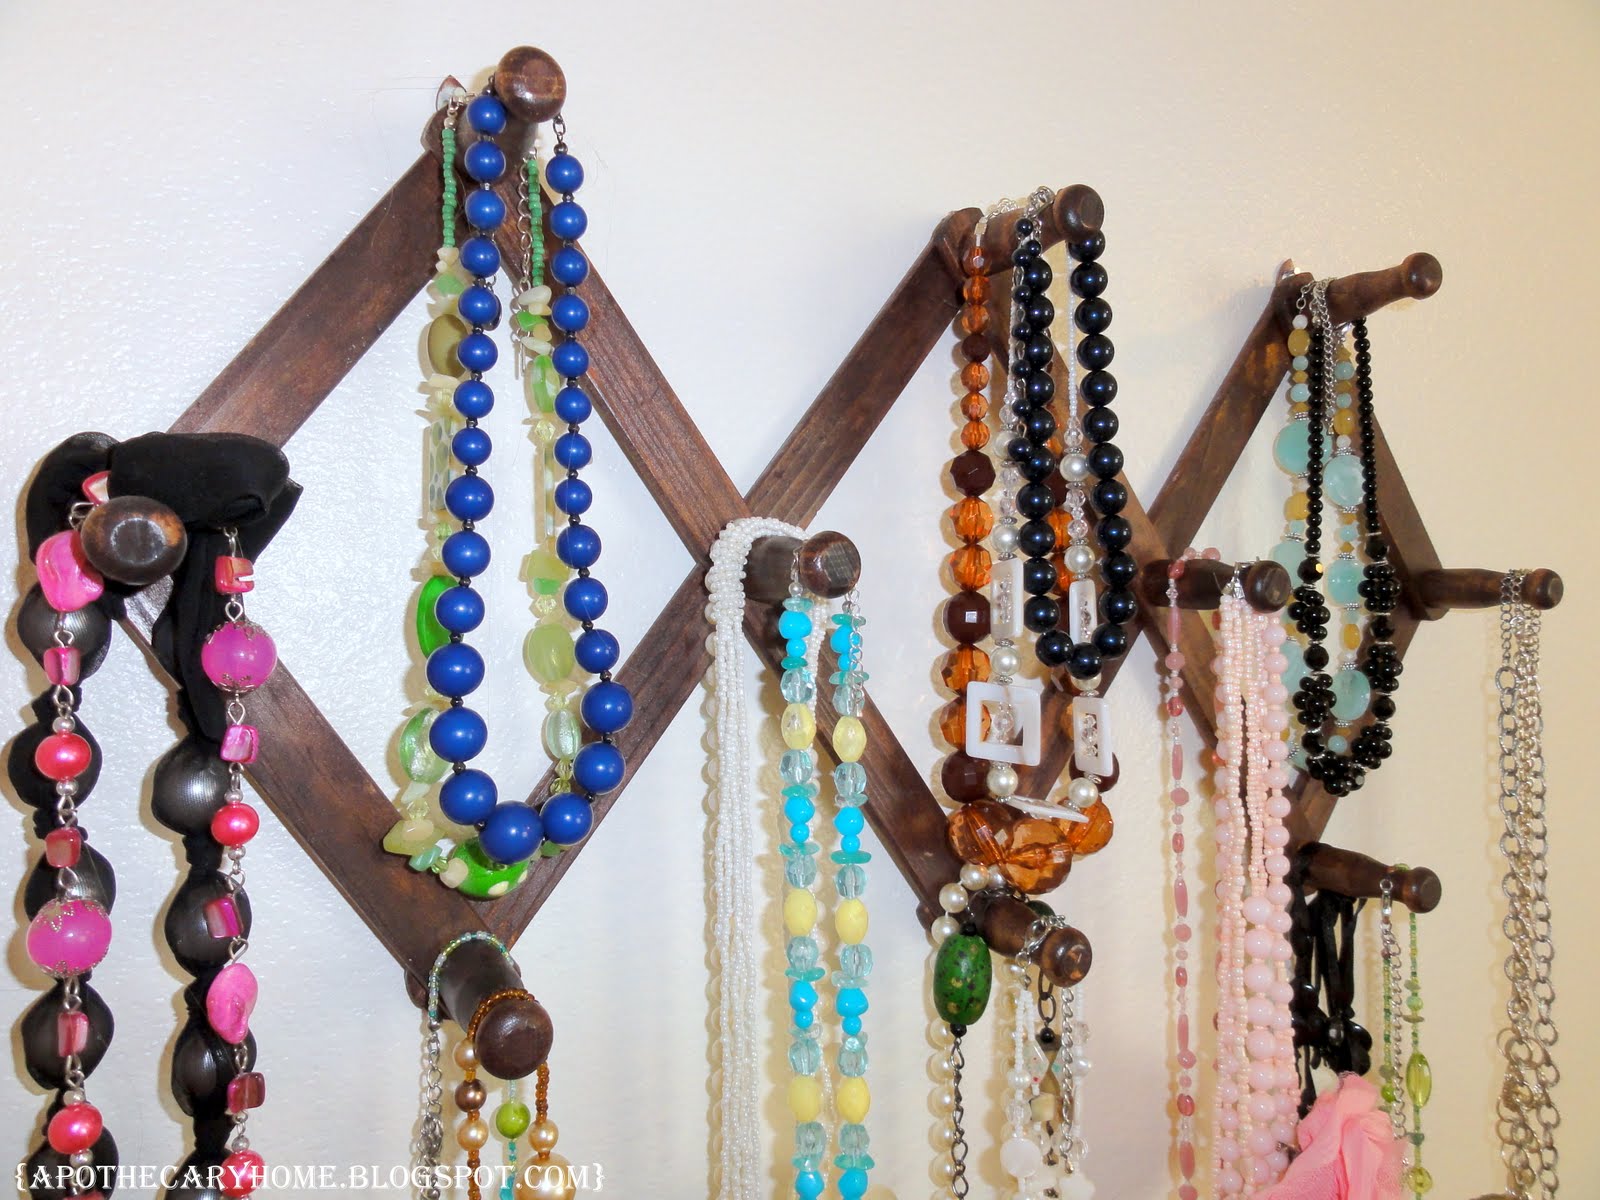
Long Necklace Storage

Long necklace storage can be a pain.
They get tangled so easily.
My solution used to be an over the door hook rack.
It would clang EVERY. TIME. THE. DOOR. WOULD. OPEN. or CLOSE.
It was annoying (my husband hardly ever complains and he hated it!)
So I came up with a better solution.

You know these things that show up at thrift stores all the time?
These accordian peg racks:


I'm really not sure what they are supposed to be used for...
hats, clothes, towels, mugs, purses, hotpads, coats?
Anybody know?

I picked up one for $1.00 at the thrift store for my necklaces.
All I did to it was stain it to match the wood on my bed and dressers,
then I sprayed it with a clear finish
.
It was soooo easy and fast! 

Next step: Hanging it on the wall & adding necklaces:


Wanna know a secret?  This is what it really looks like after all of most of my necklaces are added...


So I have a lot of necklaces...what's a girl to do?  
At least they're not clanging!

Maybe I need to get rid of some of them.
Maybe I need another holder.
I'm just keeping it real here.


Linking to:


Tuesday, August 16, 2011

One Mans Trash = This Chicks Treasure

Sheesh.  Where have I been?
Besides inlaws, work, inlaws, work, home, work...
Just trying to get settled in again and get in a routine now that I'm back from my 3 month vacay :)
I have almost everything unpacked and cleaned.
I think something about living with the bare minimum all summer has made me realize that I have a lot of junk stuff.  I have seriously been in a cleaning frenzy since I got home.
Maybe it's because I didn't fully "spring clean" but I have been going through room by room and organizing/de-junking/shining everything up.

I told you I had some trash treasures to show you.
I was just walking by our dumpster minding my own business at our apartment before we left Seattle 
when out of the blue I glanced over and saw something that caught my eye.
"Is that what I think it is?"  I thought.
I rushed over to it and snatched it up.
 Wait, there's more?
2 of them?

 score!
Hold the phone, THREE of them?!?


Say Whaaaaaat!?
Ya darn right.

Not one, not two, but three of these amazing, beautiful, perfect condition plastic frames.
I was once close to buying one like this at IKEA a few months back.
I didn't feel like forking out the $30 for it though.
Gladly rejoicing in the fact that I waited.

There you have it.
I may or may not have found other dumpster goodies too,
but we'll save that for another day.
 
I'm off to enjoy a nice summer afternoon with my family!

Don't be scared to look in dumpsters! 
Okay, maybe be a little bit cautious...


Monday, August 8, 2011

So Long, Seattle!

Just wanted to write a quick post while I should be packing to move...
If you don't know, we moved to Seattle for the summer so my husband could do an internship with Amazon.
We got to spend some time together as a family and see a few last minute sites in this beautiful city the past weekend. (like the Freemont Troll)

 And one last view of the beautiful skyline from Kerry Park:

I am flying home tomorrow with my daughter and my awesome husband is driving this weekend. 

I am excited to get back, I have a lot of projects already in the works.
But at the same time, I have also really enjoyed the 12 week vacation I have been on all summer :)
I'm really going to miss our view:

Bear with me as I get adjusted at home and work the next week (Can you believe they kept my job for me all summer? I love where I work!)
I really do have some awesome things to show you! (one may or may not involve some things I found in the dumpster!)  

For now, just gaze at that beautiful picture of Lake Union {taken from my balcany} and dream of whatever it is you dream of...ahhhh, so relaxing...

Related Posts Plugin for WordPress, Blogger...