There are about a bazillion earring holders in blogland/cyberworld. I was going to make one out of a frame and wire mesh like many people do, but then I found something BETTER! {In my humble opinion}
I honest to goodness can't remember if I found this at Marshall's or TJMaxx, LOVE them both! And you could probably find something like this at either one. It's a shadow box with a hinge door that opens and has a magnetized close. The inside is a thin foam covered with burlap. I bought 2 of them! {I have a lot of earrings...}
It was white when I bought it and I spray painted it Coral Isle to match my lamps and bring some more color accent to the room.
I also glazed the details with a dark brown:
I hung {most} of my earrings in the 2 shadowboxes. I used pins for some of the hoop ones that don't have hooks.
I hung them in the corner of my bedroom right next to my necklace holder. It is so handy to have them in close proximity.
I love that I can see right through the glass; do you ever pick out your accessories first, then chose an outfit? I do that sometimes, it's a good way to think outside the box a little bit and put together new combinations...
It opens so easily and I don't have to worry about earrings getting tangled, rifling through them to find a mate, or getting lost. Plus, it doesn't take up room on the dresser.
Seriously, it's so handy if you're looking for a cute easy way to display/store your earrings! I love it!
Linking to:
Southern Lovely
Someday Crafts
Lil Luna
Blue Cricket Design
Domestically Speaking
Sew Much Ado
Todays Creative Blog
Nap Time Crafters
Finding Fabulous
Remodelaholic
Tatertots and Jello
Design Dazzle
504 Main
Young and Crafty
Whipperberry
Redoux
Be Different Act Normal
The Gingerbread Blog
Lil Luna
Restore Interiors
Domestically Speaking
Blue Cricket Design
Showing posts with label Master Bedroom. Show all posts
Tuesday, September 27, 2011
Shadowbox Earring Holder
Labels:
color,
Frames,
glazing,
Jewelry Storage,
Master Bedroom,
spray paint,
transformations
Friday, September 23, 2011
Pinspiration Accomplished
Have you seen this quote describing Pinterest before? {I found it on, well, Pinterest}
I saw it a while back, thought it was humorous, but then became determined to not let it happen to me! I have already done a few things that I found the inspiration and ideas for on Pinterest. One of them was this hairstyle:
I actually did something similar to this to my hair! Twice! And neither time did I think to get a picture of it. But, I never would have thought to try it if I didn't see this picture.
Another project I did was make some flip-flop hangers. Remember when I shared this picture?
We have some awkward space in the corners of our closet where we can't really hang clothes and there is wasted room. Since I might have a wholelotta shoes, I figured I should try to use that space!
I had a broken pants hanger one day that I was about to throw away, when I remembered the flip-flop hangers I had seen on Pinterest. I did a test run on it and liked the way it worked so I asked for some pants hangers from the dry cleaners the next time I was there. And they gave them to me. For FREE.
So, here's what I did. Take a hanger and break the papery part in half. This just allows you to get it off a little easier. You king of have to work at it a little, twisting it off.
After the paper part is off it will look like this:
Then, just bend up each edge to the center, like this:
And you're left with a cute, little hanger:
Just slip your shoes inside and you're good to go!
Soooo easy! I didn't have to cut any wire and it took about 2 minutes per hanger. They are definitely not as cute as the ones that Jen did on EPBOT; but they function and they hide in the corners of my closet! What a great way to conceal those seasonal shoes!
So there! That's at least two things that I've actually done something with from Pinterest. I need to get in the kitchen next and re-create some of that yummy food I've found!
Have you done anything with the inspiration you find? If not, remove yourself from the computer for a bit and DO IT! :)
I saw it a while back, thought it was humorous, but then became determined to not let it happen to me! I have already done a few things that I found the inspiration and ideas for on Pinterest. One of them was this hairstyle:
I actually did something similar to this to my hair! Twice! And neither time did I think to get a picture of it. But, I never would have thought to try it if I didn't see this picture.
Another project I did was make some flip-flop hangers. Remember when I shared this picture?
We have some awkward space in the corners of our closet where we can't really hang clothes and there is wasted room. Since I might have a wholelotta shoes, I figured I should try to use that space!
I had a broken pants hanger one day that I was about to throw away, when I remembered the flip-flop hangers I had seen on Pinterest. I did a test run on it and liked the way it worked so I asked for some pants hangers from the dry cleaners the next time I was there. And they gave them to me. For FREE.
So, here's what I did. Take a hanger and break the papery part in half. This just allows you to get it off a little easier. You king of have to work at it a little, twisting it off.
After the paper part is off it will look like this:
Then, just bend up each edge to the center, like this:
And you're left with a cute, little hanger:
Just slip your shoes inside and you're good to go!
Soooo easy! I didn't have to cut any wire and it took about 2 minutes per hanger. They are definitely not as cute as the ones that Jen did on EPBOT; but they function and they hide in the corners of my closet! What a great way to conceal those seasonal shoes!
So there! That's at least two things that I've actually done something with from Pinterest. I need to get in the kitchen next and re-create some of that yummy food I've found!
Have you done anything with the inspiration you find? If not, remove yourself from the computer for a bit and DO IT! :)
Labels:
Master Bedroom,
Pinterest,
transformations
Wednesday, August 3, 2011
Jewelry Stand/Holder/Keeper
I don't know what this is:
Could be a cake stand, but it's kinda small for that. And not durable enough.
I think it's a candle holder, like for a big candle, or maybe a few smaller ones?
Whatever it may be, I picked it up at a thrift store by my house
(which is out of business now, boo)
I really love how ornate it is.
But, I'm not a gold person.
I decided I wanted to use it in my bedroom as a jewelry holder.
At night when I'm too lazy tired to hang my jewelry back in place, it works very nicely.
It makes the jewelry feel like it belongs there.
I decided to paint it the same color as my lamps
I love the coral color with the aqua, cream, and brown in the room.
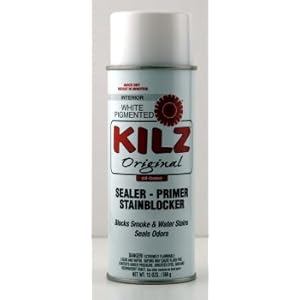
I primed with Kilz,
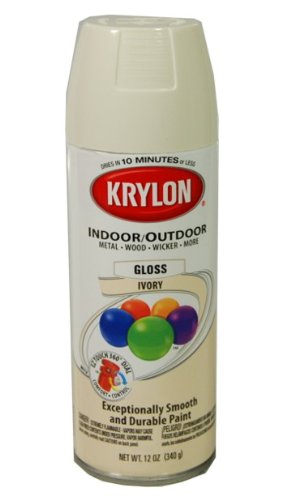
Spray painted it with Krylon Coral Isle,
and of course had to glaze it to make those ornate details pop.
It also accommodates some of my larger odd-shaped earrings that don't fit with my other ones.
Isn't it purdy?
Thursday, July 21, 2011
Jewelry Box Re-do {A Mini Makeover}
I have never liked my jewelry box.
It's always been the wrong color.
So I fixed it.
I gave it a makeover.
It's a mini-me of my dresser now.
I LOVE it! :)
Silly me, I didn't take a before picture...or I can't find it...
I did find a similar one online though:
This isn't my exact jewelry box, but the color and the brassy knobs are IDENTICAL to what I had.
I started my "mini makeover"
I took off the mini-hardware with a mini-screwdriver,
taped off the glass,
took out the mini-drawers,
primed everything with Kilz:
and spray painted Krylon Ivory gloss:
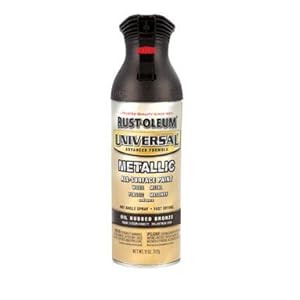
I sprayed the mini-knobs with ORB:
The project wasn't complete until I added some glazey goodness (I used BEHR brand from home depot and mixed 1 part paint to 4 parts glaze):
I didn't take a picture of the "before glaze" jewelry box, but found this identical one online:
![]() |
| Wish they would have had this color when I bought mine... |
And the "after glaze" finished product:
It looks great on top of it's master (see here):
It sort of reminds me of when my mom used to make my dolls the same outfit as me...
That was so cool.
That was so cool.
My jewelry box finally looks like it belongs after being a misfit for 7 years. (Of course, my whole bedroom used to be a misfit so I can't blame the jewelry box)
I can't even describe how FUN it was to work on this! It was just soooo...petite.
{Stay tuned to see my other jewelry storage options for long necklaces and earrings!}
Linking to:
Remodelaholic: Remodelaholic's Anonymous
Tatertots and Jello: Weekend Wrap Up
Sassy Sites
I Heart Naptime
Not Just a Housewife
DIY Showoff
Lil' Luna
Restore Interiors
Domestically Speaking
Primitive & Proper
Thrifty 101
Perfectly Imperfect
Shabby Nest
Fingerprints on the Fridge
Chic on a Shoestring
Finding Fabulous
Remodelaholic
I Heart Naptime
Linking to:
Remodelaholic: Remodelaholic's Anonymous
Tatertots and Jello: Weekend Wrap Up
Sassy Sites
I Heart Naptime
Not Just a Housewife
DIY Showoff
Lil' Luna
Restore Interiors
Domestically Speaking
Primitive & Proper
Thrifty 101
Perfectly Imperfect
Shabby Nest
Fingerprints on the Fridge
Chic on a Shoestring
Finding Fabulous
Remodelaholic
I Heart Naptime
Labels:
furniture,
glazing,
Jewelry Storage,
Master Bedroom,
spray paint,
transformations
Friday, July 15, 2011
Lamp Revamp
I love it when you are looking for something and it turns out to be right under your nose! That's what happened when I expressed to my mom and dad that I was looking for a pair of lamps for my newly refinished nightstands. (here)
My dad just happened to be restoring one of his rental homes and said that he had 2 lamps out on his trailer headed for the trash! WHAAAAAT!?!
I raced outside right away, and sure enough found these beauties:
Ceramic mint green bodies {plus} golden swirls {plus} glittery leaves {plus} bases with spurts of rust
{=====EQUALS=====}
SPLENDID CANDIDATE FOR MAKEOVER!
I'm pretty sure my parents thought I was insane.
(But glad at the same time that they had raised a daughter to be so thrifty!)
QUESTIONS:
First things first, do they even work?
[check, even have a 3-way dimmer]
What color do I paint them?
[how about some sort of coral color]
like say,
Krylon Coral Isle...
And the base?
[that's easy, ORB]
I sanded the base a little bit with some steel wool, and since there were some raised paint splotches & splatters on the ceramic, I sanded and scraped those off so I had a smooth surface
A few coats of spray paint, some lamp-shades, and a couple finials later:
One last question that I haven't resolved yet...
Do I paint the patterns or not?
I did on this one:
But didn't on this one:
Soooo, paint or no paint?
What do you think?
{I've also got some plans in the works to pretty up the shades a bit}
Labels:
color,
Lamps,
Master Bedroom,
spray paint,
transformations
Wednesday, July 6, 2011
Ivory Bliss
I found this set of dressers at a consignment shop for a great deal! (see here)
I knew exactly what I wanted to do with them for my bedroom!
I took off all the hardware first.
I love the handles, but I was a couple short!
I did all sorts of research to find out if I could get more or even have some made.
In the end, I found some vintage brass ones on etsy that didn't match exactly but would work perfect for one of the dressers.
Here's the steps I took:
Sprayed the handles ORB
Removed all the drawers (14 TOTAL!)
Washed and prepared them for priming
Spray-primed them with Kilz
Spray-painted a couple coats of Krylon Ivory Gloss
used the same brown glaze from my nightstands
And finally, a few coats of polycrylic!
And that was just the drawers...
I ended up stripping and sanding just the tops of the dressers so I could stain them
I used red mahogany stain so the tops would match my headboard/footboard and tie them together.
I taped the top part off, then primed, painted, glazed and poly'd the rest!
(then did the same thing to the mirror)
I LOVE the way they turned out!
Here's some up close goodness of the glazed details:
Did I mention how much I LOVE THEM?!
Linking to:
Thrifty Decor Chick: Before & After Party
Transformation Thursday at The Shabby Chic Cottage
Somewhat Simple: Strut Your Stuff
Perfectly Imperfect: All Things Furniture
The Shabby Nest: Frugal Friday
Restore Interiors
Primitive and Proper
Miss Mustard Seed: Furniture Feature Friday
Simple Home Life
Chic on a Shoestring: Flaunt it Friday
Remodelaholic: Remodelaholic's Anonymous
Finding Fabulous: Frugalicious Friday
Tatertots and Jello: Weekend Wrap-Up
Fingerprints on the Fridge
I Heart Naptime: Sundae Scoop
The DIY Showoff: Project Parade
Domestically Speaking: Power of Paint
Labels:
furniture,
glazing,
Master Bedroom,
spray paint,
transformations
Saturday, July 2, 2011
Lucky Find?
Some people would call me lucky.
My husband and I have won a reasonable amount of things in our lifetime
(in fact, the hubsters even started a list -haha)
But a big part of luck is being in the right place at the right time.
After we moved to Utah I was still on a furniture hunt
(even though our garage was filled with to-do projects)
We stopped by a consignment shop
it was filled with beautiful furnishings,
most of which had high price tags and work already done
but in the back corner of the shop there was a dresser set
a tall one, a long one, and a big mirror
the price tag on each piece said $100
This is what I was looking for
made by Thomasville, solid wood, all drawers were functioning,
but $200 was too steep for me
What's that Mr. Salesman?
You'll give me the whole set for $100?
YES!
It was my lucky day!
See for yourself:
These babies are going to look awesome in my Master Bedroom!
Labels:
furniture,
Master Bedroom
Subscribe to:
Posts (Atom)